Mini Extruder Pro Extrusion Technique
NOTE: Extrusion of multilamellar liposomal suspensions using membranes with a pore size >0.2µm does not produce unilamellar liposomes. Liposomes produced with larger pore membranes will yield a polydisperse suspension of multilamellar liposomes. Unilamellar liposomal suspensions with a low polydispersity can only be prepared with membranes having a pore size of ≤0.2µm.
To reduce the dead volume and check for leaks prior to extrusion, pre wet the extruder parts by passing a syringe full of buffer through the extruder. DISCARD THE BUFFER. New syringes may have tight fitting parts.
IMPORTANT: Polycarbonate membranes and filter supports are intended to be used for a single liposome preparation and should not be reused.
1. Prepare dry lipid mixture by lyophilization or evaporation.
2. Place the extruder base onto a hot plate. Insert a thermometer into the well provided in the heating block. Switch the hot plate on and allow to reach the desired temperature (approximately 15 minutes). Note: The Mini Extruder Pro is designed to accommodate temperatures up to 80°C. Setting the hot plate to higher temperatures will result in damage of extruder and syringe components.
3. Place the fully assembled Mini Extruder Pro into the extruder base. Ensure the retainer nut is oriented properly and the stainless steel casing is clipped into the base.
4. Hydrate the lipid mixture using a suitable buffer for at least 30 min. The lipid suspension should be kept above the phase transition temperature of the lipid during hydration and extrusion. To increase the efficiency of entrapment of water-soluble compounds, subject the hydrated lipid suspension to 3-5 freeze/thaw cycles by alternately placing the sample vial in a dry ice bath and warm water bath.
5. Once hydrated, load sample into one gas-tight syringe and dock into one side of the Mini Extruder Pro by sliding it firmly along the syringe well in the extruder base. Do not twist the syringe during insertion into the Mini Extruder body. This will loosen the needle and result in leakage.
6. Make sure the empty syringe plunger is set to zero and place the empty gas-tight syringe into the other end of the mini-extruder by first placing it on the base and sliding it into the Mini Extruder Pro body until it is firmly seated in the syringe well of the extruder base. When docking the syringes into the Mini Extruder, do not twist the syringes. This will result in loosening of the needles and create a leakage point.

Use the swing-arm clips to hold the syringes in good thermal contact with the heating block.

7. Gently push the plunger of the filled syringe until the lipid solution is completely transferred to the alternate syringe.

8. Gently push the plunger of the alternate syringe to transfer the solution back to the original syringe.
9. Repeat process of pushing the solution back and forth through the extruder until you have reached a minimum of 11 passes through membrane. In general, the more passes through the membrane, the more homogenous the lipid solution becomes.

10. The final extrusion should be collected from the alternate syringe. This is to reduce the chances of contamination with larger particles or foreign material.
11. After the final extrusion, remove the Mini Extruder Pro from the heating block.
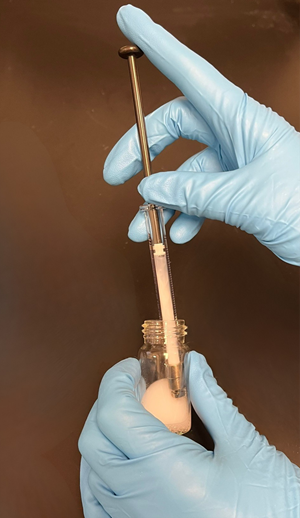
12. Gently remove the filled syringe from the extruder and inject the lipid solution into a clean sample vial. Be careful, as the solution and syringe will be hot.
IMPORTANT: When removing syringes, pull the syringe straight out of the extruder by sliding it on the base; removing at an angle will result in damage to the needle and possibly cracking the syringe.